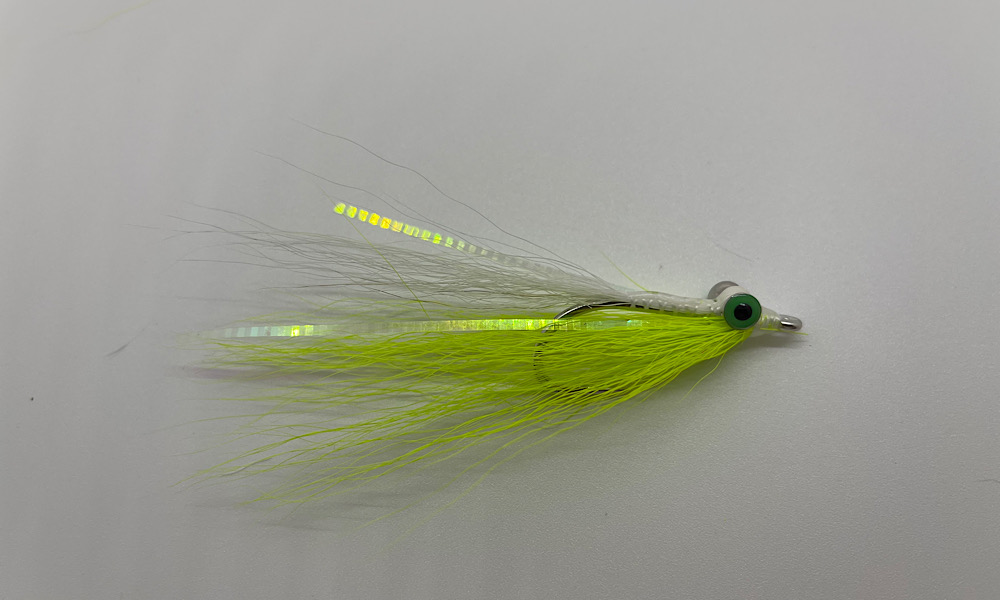
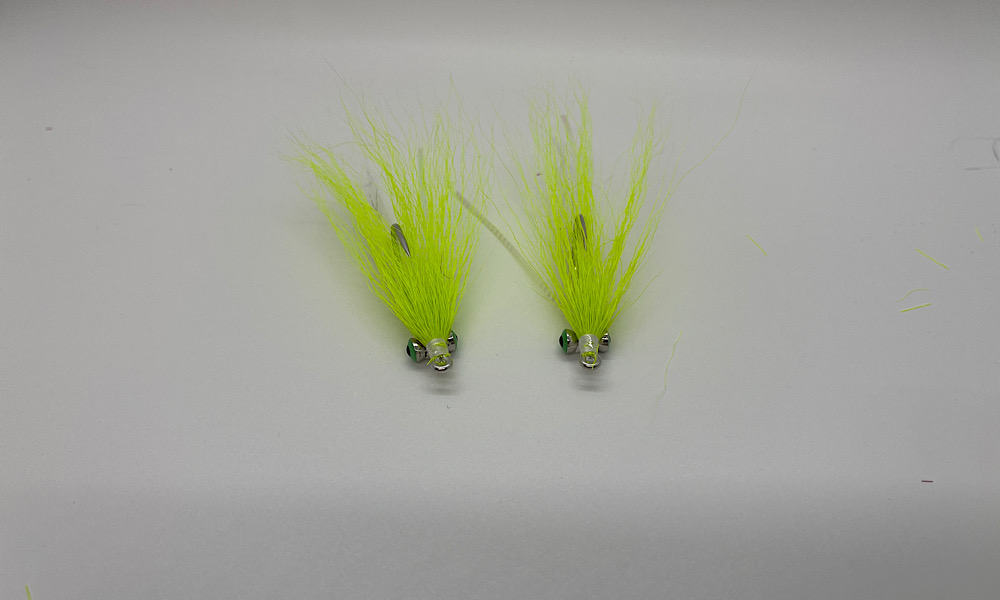
Clouser Minnow
Clouser Minnow Recipe
Hook - Gamakatsu SL11-3H
Thread:Thread - Veevus GSP
Eyes:EYES - Nickel Dumbbell Eyes - Large
Body:Bucktail - Bucktail - White - Large
Flash:Flash - Flash
Resin:Adhesive - UV RESIN
Recipe By
Jay VerHelstAbout the Clouser Minnow
Its a classic that is still highly used today in both fresh and salt water applications. This tried and true quick and easy tie carries some weight with the dumbbell eyes and hook. This baitfish imitation casts fast and can dive deep even with e decently fast retrieve. tie this up in a few different size and color variations and you can cover a wide range of baitfish. Bass love them just as much as giant Tarpon in the Keys!
How to tie the Clouser Minnow
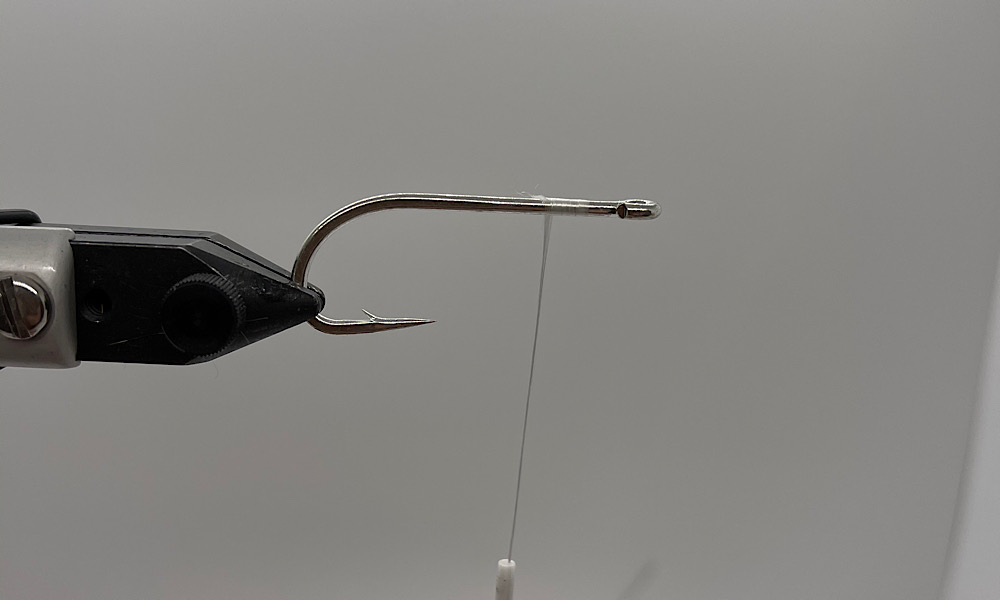
Step 1: Start
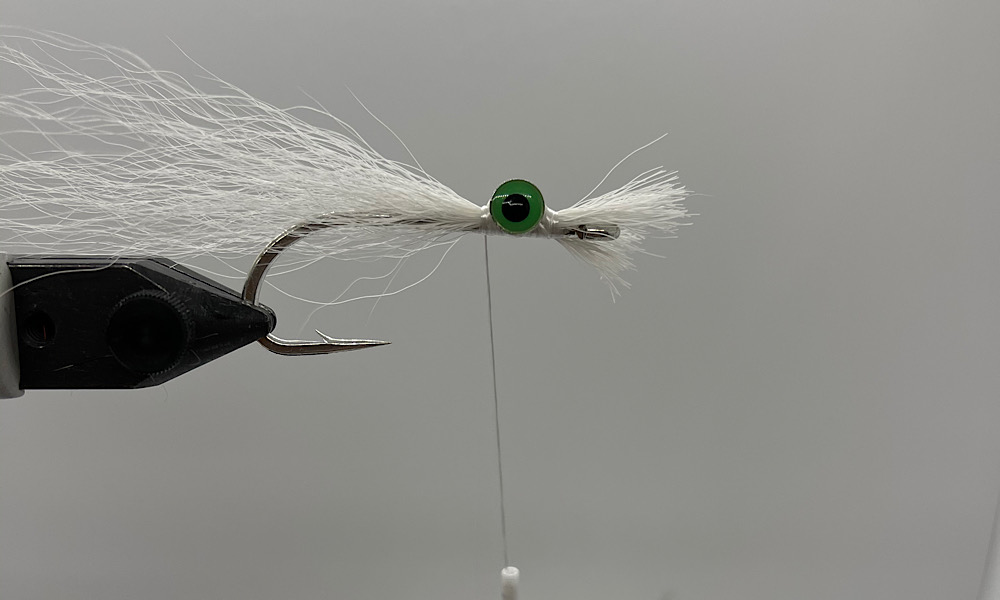
Insert hook into the Vise and secure for tying. Tie in White GSP thread behind hook eye and work 1/4 “ back. Lay down overlapping wraps to create a nice base on the hook for the eyes to sit.
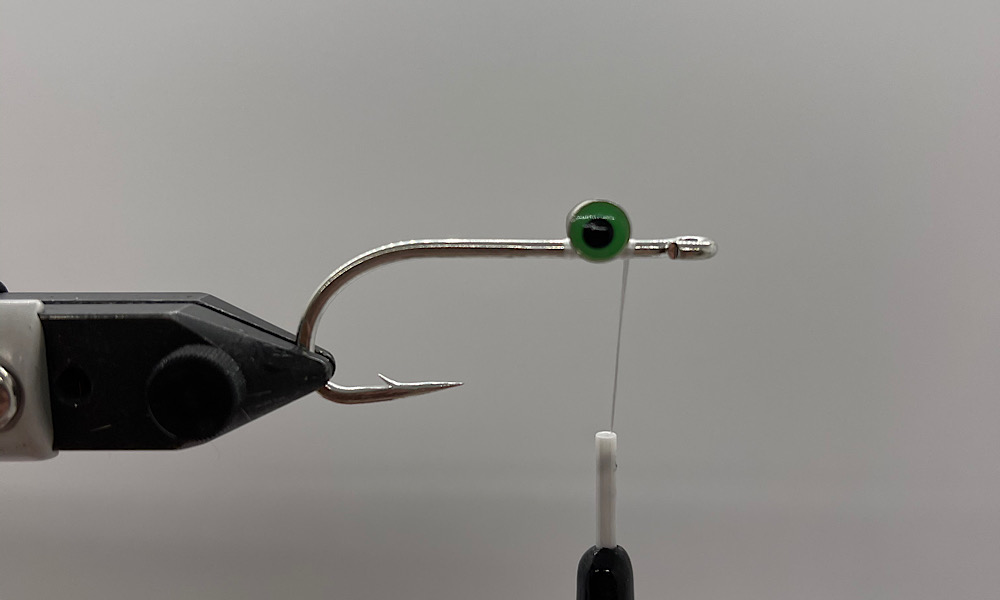
Step 2: EYES
Select the color eyes you want to use and secure them with figure 8 wraps around the eyes and the hook. Pull tightly on these wraps as you want these eyes secure. Add Super glue if needed.
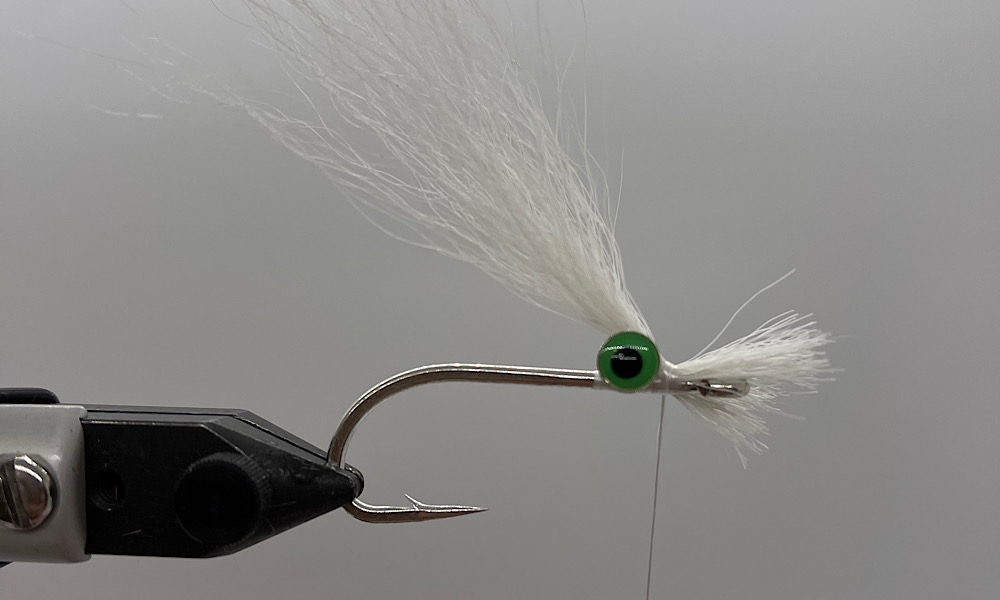
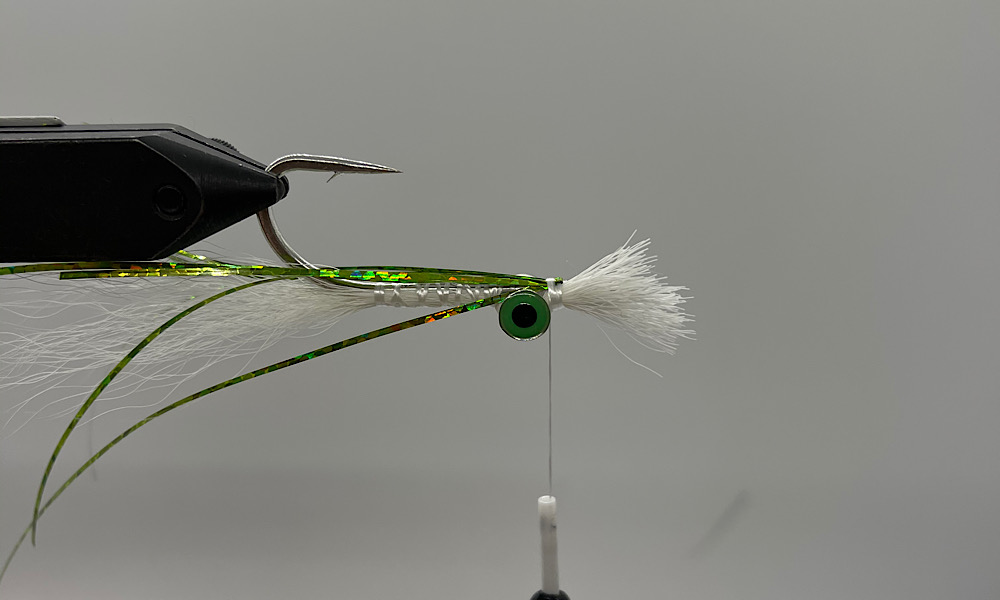
Step 3: Buck tail
Select some white buck tail at least twice as long as the hook and the clump should be half the size of a pencil. A little longer is better for tying in. Tie in the buck tail with tips facing towards the rear of the hook and secure with tight wraps of your GSP Thread
Step 4: Body
Wrap thread to the backside of the eyes and make 4-5 tight wraps. Lay the buck tail down over the eyes and secure with a few tight wraps. Buck tail is tough and my try to flex out of position. Make a few more wraps if needed to secure.
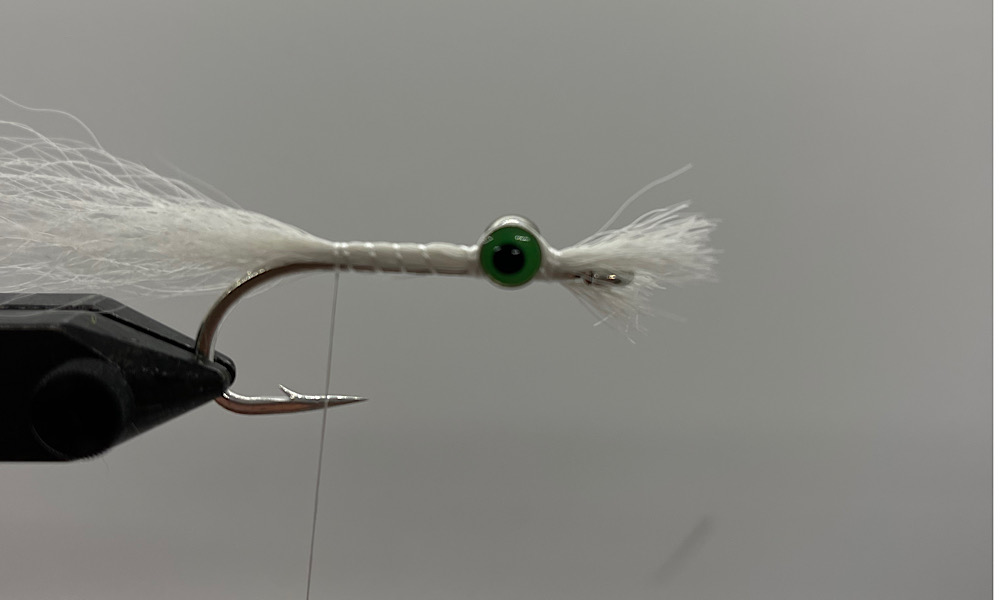
Step 5: Move thread
Grasp the tips of the buck tail and gently raise them at an upward angle with one hand and wrap thread leaving space between each wrap to just past and above the hook shank
Step 6: Ribbing
Wrap the thread back to the far side eyes repeating the previous procedure with space between wraps
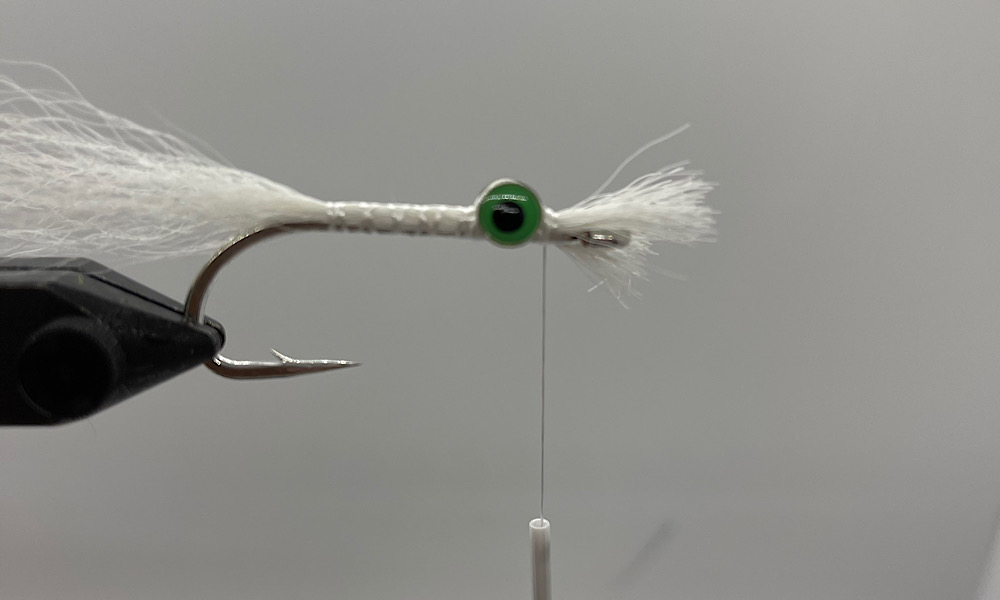
Step 7: Turn fly over
Invert fly so the eyes are now under the hook and your hook point is up. Select two strands of Flash, matching your color choices of buck tail, and tie in at the halfway mark of the flash
Step 8: Flash
Fold the other half of the flash back and tie in. Trim off white buck tail butt ends on the hook eye side
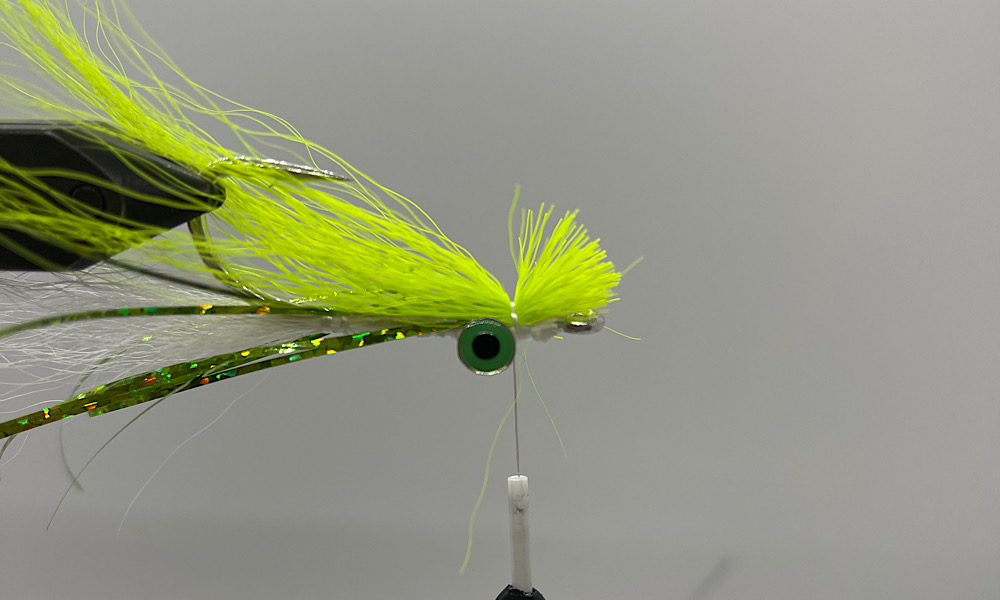
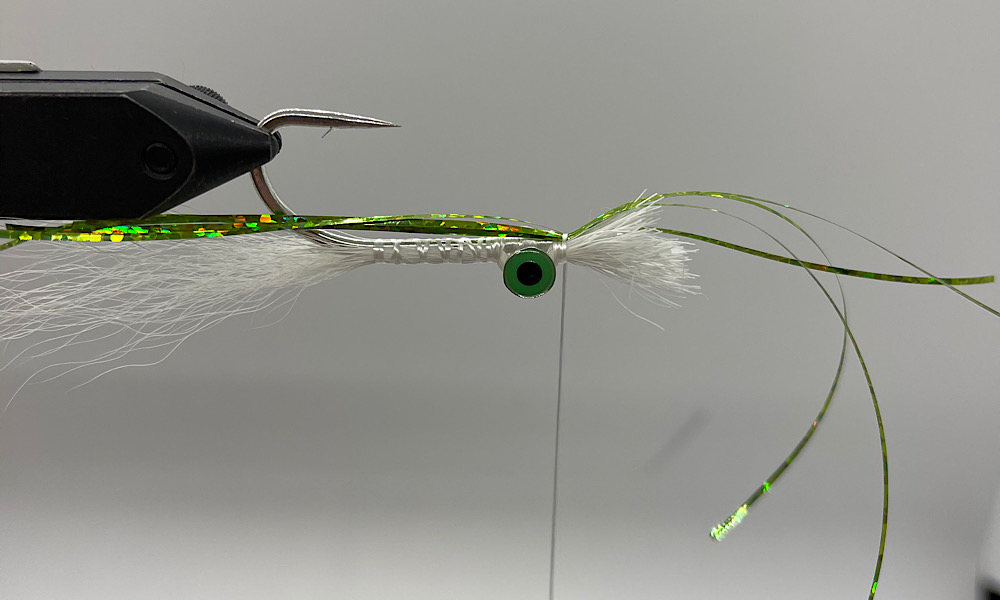
Step 9: Buck tail
Select another clump of buck tail, in chartreuse, the same size as the white buck tail and tie in the same manner over the flash under the eyes. Creating two tone with colors gives your fly dimension and Weill help to closely imitate baitfish

Step 10: Trim
Trim the butt of the buck tail that you tied in
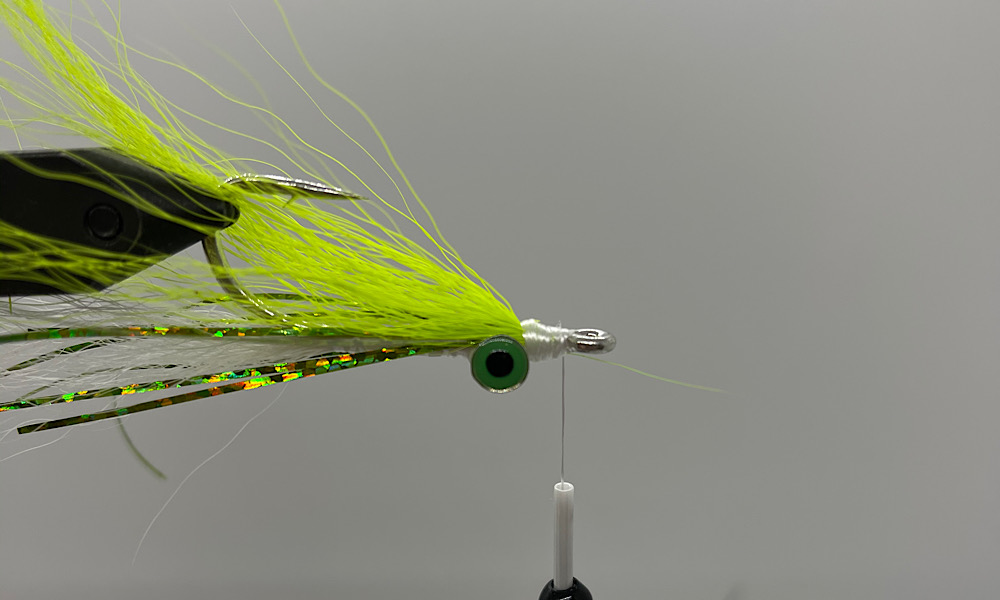
Step 11: Head
Using consecutive thread wraps create a tapered head over the trimmed bucktail. Whip finish or use half hitches to tie in thread. Cut tag end.
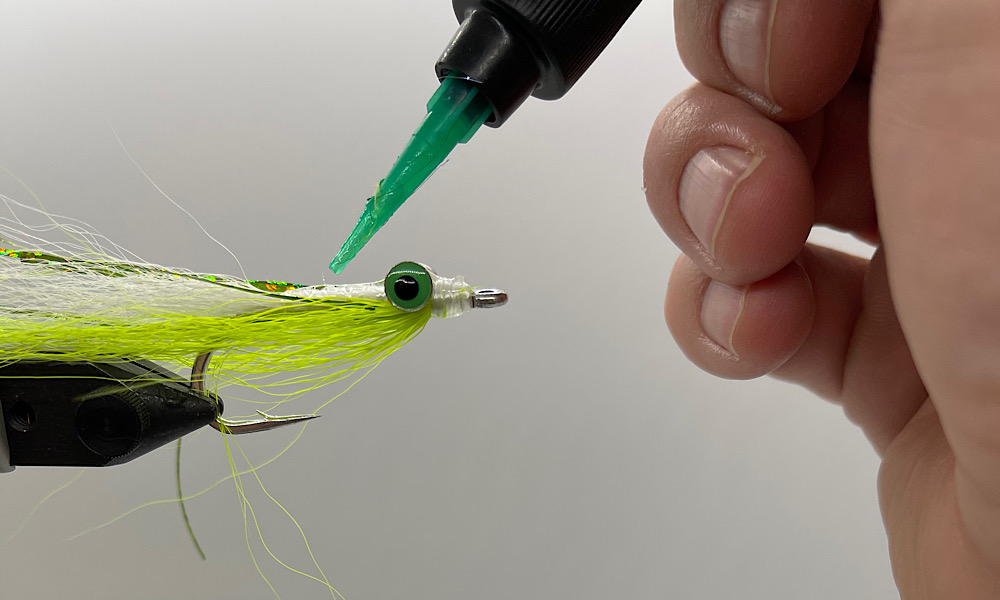
Step 12: Resin
Using UV Resin cover the tapered head down the back where you tied in the ribbed section of the buck tail ( Steps 5 & 6) to secure and make a hard coating.
Step 13: Send it!
Cast, retrieve and don’t forget to strip set!